
Mead recipe
Here are our secrets (shhhh) for crafting a mead that challenges the conventional. Join us and watch how our editions make the Matrix readjust itself ;as if it had detected something that shouldn’t taste that good.
Mead recipe
Video: how to prepare your homemade mead | Recipe with the Odin Method
00:00 Introduction (because even heroes need to introduce themselves)
00:47 Ingredients.
02:44 Utensilis.
04:18 Preparation.
11:35 Fermentation
12:48 Bottling.
15:42 Thermal stabilisation
21:00 Outtakes Odin didn’t approve (but Loki did)
The Odin method
Ever wondered how you can make mead at home? Following our recipe lets you create a technical, Odin‑style flavour edition without having to summon your mates (though yes, there’s always the risk they’ll settle on your sofa like a clan of dwarves).
Key advantages of the Odin method
- Record production time
- The sweetness you desire
- The alcohol level you choose
- You only need kitchen equipment
- Stable mead with no re‑fermentation
- Use the method in (almost) any recipe
- (Un)conventional style
Example mead recipe info
- Difficulty level: easy.
- Total fermentation time: 8–12 days.
- Alcohol: approx. 8%.
- Traditional sweet style.
Mead ingredients
- 1 L of natural mineral water — avoid chlorinated tap water unless you want your recipe to taste like a dystopian swimming pool.
- 315 g of honey of any variety (around 220 ml in a measuring jug).
- 0.5 g of wine or beer yeast, or fresh yeast from any grocery shop.
Equipment you’ll need
- A glass bottle, demijohn or any container where water and honey can ferment. Some people use a plastic jug, though it’s not recommended.
- A balloon and a needle.
- A pot.
- A thermometer up to 100°C (optional but highly recommended).
So… how do you actually make mead? Contrary to what everyone thinks, making mead is far simpler than it seems — the hard part is making it good. And for that, we’ll explain how to craft a mead worthy of the halls of Valhalla using nothing more than everyday household gear.
Let’s begin.
How to make homemade mead
1) ¡Qué no te engañen! Compra la miel y la levadura adecuadas.
The first thing you need to do is look for good honey. Ideally, buy it directly from a beekeeper. Supermarket honey can work, though it’s usually not great quality — but don’t worry if you can’t get anything better. Many of us started with low‑tier honeys because they’re cheaper, letting you experiment more at the beginning without risking a premium batch.
If you want to know how to recognise good honey, I recommend checking our secrets section where we explain it. And watch out for honey substitutes (seriously).
As for the yeast, this will be responsible for starting fermentation and turning water and honey into delicious mead. For the Odin‑method recipe, the ideal choice is beer or wine yeast of the Saccharomyces cerevisiae variety, but you can also use fresh yeast from the supermarket. We mean those little cubes in the refrigerated section used for baking — because bread yeast also ferments, and it will work for your mead recipe -. Be careful not to buy chemical “baking powder” yeast from sachets; that’s not yeast at all. Make sure it’s fresh yeast.
Finally, keep in mind that specific wine or beer yeasts will make your mead ferment faster. Otherwise, the process may take several extra days.
2) Good mead equals good hygiene
To avoid contamination, you’ll need a pot where you can heat water and boil all the equipment you’re going to use – except the thermometer! Don’t boil the thermometer unless you want it exploding in your face. If it can measure up to 100°C, it’s enough to submerge it in hot water without letting it touch the bottom of the pot. Otherwise, wash it thoroughly with soap and water.
The proper process is to first wash everything you’re going to use with soap and water, and then place it in boiling water for at least 10 minutes to sterilise it.
Ideally, the container you’ll use for fermentation should also get a 10‑minute hot‑water bath. It needs to be properly clean.
3) How to make mead and mix it properly from the very beginning
In a measuring jug that reaches 1 L, pour 220 ml of honey (315 g) and then fill it with water until the total volume of the honey‑and‑water mixture reaches 1 L.
With a plastic kitchen measuring jug, this is super easy.
At this point, if your mead must isn’t at 23–25°C, you’ll need to pour the mixture into a pot and heat it until it reaches 25°C. If you don’t have a thermometer at home, it’s better not to heat it — or just give it a quick warm‑up to “kill the cold”.
If you overshoot the temperature, you can cool it down by filling the sink with cold tap water and placing the pot inside so the temperature drops back to 25°C.
Once this is done, transfer the mixture to the container where you’ll ferment it and add the yeast.
But don’t think you’re going to add the yeast the way you’d sprinkle salt on chickpeas (you could, technically, but it’s not ideal).
Take a clean glass and add 25 ml of water — roughly a finger’s depth. This water must be at 25°C to reactivate the yeast. Mix the yeast with the water and wait 10 minutes. Then add it to the honey‑and‑water mixture. Always use natural mineral water without chlorine.
Once the yeast is added, close the fermenter with an airlock, or if not, with a balloon from a bargain shop and a needle prick. If you don’t protect your mead from oxygen during fermentation, it will get contaminated.
VERY IMPORTANT: use chlorine‑free water for the entire process — bottled water works perfectly.
Your mead recipe is almost ready!
4) Time to ferment
To store the fermenter during the process and achieve a mead with a proper technical profile, you’ll need to choose a place that:
- Maintains a stable temperature — neither too cold nor too hot — ideally around 23°C.
- Isn’t a room where anyone sleeps, since the CO₂ produced during fermentation is dangerous at high concentrations.
- Is protected from sunlight, ideally a dark spot.
You’ll know the fermentation has begun because you’ll see bubbles rising from the bottom. Also, the balloon you pricked and placed on the mouth of the demijohn or bottle will be inflated.
At this point, you’ll discover what true impatience feels like — watching the bubbles rise while you chew your nails, waiting for the moment you can finally fill your tankard and taste the result.
5) Bottling and pasteurising. The Odin method mead has fermented
The reason the Odin method is one of the simplest and most efficient ways to make a good mead is that it lets you bottle it at the exact sweetness level you want — and ensures a stable, long‑lasting mead without re‑fermentation in the bottles, which would otherwise ruin your batch.
From day 5 or 6 of fermentation onwards, you’ll need to start tasting your mead. I recommend using a long syringe to extract the samples you’ll be testing. Ideally, sterilise the syringe in boiling water — or at the very least make sure it’s completely clean.
Once you notice your mead is no longer overly sweet and starts becoming semi‑dry, it will be roughly 10% alcohol. If you bottle a bit earlier, it will be around 8%. With a hydrometer you could know the exact alcohol level, but we won’t go into that here — this Odin‑style recipe only uses items you can find in a normal kitchen.
When it reaches the sweetness level you like, take a flexible tube and siphon the mead into the bottles using the “communicating vessels” method. You can reuse bottles, but they must be properly clean.
Also, try not to bottle the sediment from the fermenter.
Then close the bottles and pasteurise them following the Odin pasteurisation method. But remember to follow all precautions — bottles can explode during pasteurisation.
You’ll need to protect your eyes with sealed safety goggles, as well as any skin that could be exposed if a bottle bursts.
Heat increases pressure, and if you delay pasteurising after bottling, the bottles may build up gas, which will increase even more with temperature. In the video we give a few extra tips on this.
If you don’t let the bottles build up gas, it’s very unlikely they’ll explode — but it’s still a risk you must always keep in mind to protect yourself.
To pasteurise, place all the bottles in a pot without letting them touch the bottom directly, and heat them. Leave one bottle open so you can measure its temperature. When it reaches 73°C, remove it immediately from the pot and let it cool at room temperature to complete the process.
Once this is done, your mead is ready. Chill the bottles in the fridge and offer your creation to the gods of Asgard — hopefully they’ll leave some for your friends.
Note 1: The fermentation times mentioned apply when using yeasts like Safale T58 from Fermentis or similar. If you use bread yeast, the process may take longer.
Note 2: Low temperatures can almost halt fermentation and extend the process significantly, while high temperatures will damage your mead. Fermentation temperature ranges are usually indicated by each yeast supplier.
Some secrets
The five secrets of the Odin method
Our method is based on five fundamental pillars. We’ve called them “secrets” because for years this was genuinely information reserved for our own production.
You may be wondering… And how come you’re revealing your manufacturing secrets now? The answer is simpler than it seems — but first I’ll tell you what those secrets are, and at the end (so you don’t get bored if you don’t want to read it all), I’ll explain why.
Here are the secrets in order of importance for us, starting with the basics and ending with the ones that have been truly key. Let’s begin.
First secret: learn to identify honey quality
Many times we go to the supermarket and buy honey without realising it may be adulterated with glucose syrup or simply be very low‑quality honey. Sometimes they even try to pass off molasses as honey, calling it “cane honey” or similar names.
You should know that honey can only come from bees, and one way to check whether it’s 100% honey or adulterated is to put it in the fridge and see if it crystallises. Crystallisation at low temperatures is a guarantee of quality — if it isn’t pure, it won’t crystallise (at least European varieties won’t).
Another simple way to check its purity is to read the ingredients: it should only say “honey”. It may sound obvious, but it can save you from buying a honey substitute.
Then there’s the important matter of origin. While it’s true that every country has excellent honeys, the ones arriving from places like Argentina or China at very competitive prices are usually low‑quality.
And yes — Argentina and China absolutely do have excellent honeys. But those aren’t the ones you’ll find cheap in the supermarket.
The issue with these low‑cost honeys is that beekeepers often feed bees with glucose syrups to increase production. And honey produced by bees that consume large amounts of syrup results in low‑quality honey.
We’d bet our hand — or a first‑edition RPG manual — that this fact caught you off guard and without any faith points left.
You can use these honeys perfectly well, but it’s better to make sure they come from your region or country.
Lastly, and no less important: taste the honey.If it’s not very floral and tastes like caramel, it probably contains glucose syrup or the bees were fed with syrups.
Here’s some homework:
Take one jar of honey you know isn’t good quality and another that is. Taste one, then the other… you’ll notice the difference.
Second secret: maximising thermal control
Fermentation temperature is crucial for producing good mead — it can be the difference between Thor himself showing up to taste your batch, or your mead going straight to the toilet.
You should know that yeast, being a living microorganism, is very affected by temperature.
It’s simple: you can’t work properly under 40°C in full sun, nor at –4°C in a climate colder than your ex’s heart. Yeast is exactly the same.
Depending on the yeast strain you choose, it will have a specific working temperature range, but most perform well between 20°C and 23°C at room temperature. They generate their own heat during fermentation, so if the room is at 25°C, they’ll push the mead up to 27–28°C. But if the temperature drops below 18°C with yeasts like Safale T58, you’ll see fermentation practically stall.
And that’s without mentioning that high temperatures are the perfect environment for unwanted microorganisms to reproduce, generating off‑flavours and unpleasant aromas. Yeast exposed to high temperatures will also produce undesirable notes.
Third secret: identifying whether it’s fermenting properly
Every time you approach the fermenter to watch the CO₂ bubbles rise — or simply to fantasise about the day you’ll finally taste the result — how do you know if things are going well? How can you tell whether your yeast is comfortably enjoying a glorious honey feast, or struggling to metabolise a single miserable molecule of fructose?
Two tricks to know if your mead is fermenting properly:
- First trick: smell and taste your mead in progress. If you’ve used light honeys, the aroma should remind you of green apple. This comes from acetaldehyde, a compound that tells you fermentation is underway in its early stages. This aroma disappears once the mead reaches around 5–6% alcohol.
It’s not considered a defect if it’s part of the recipe’s expected profile.
So, if you detect a floral‑green‑apple aroma, you’re on the right path.
The flavour should be sweet, with nuances from the honey you used. It may also remind you of sweet cider, or show fruity notes like pear or banana if it’s fermenting at a warm — but not excessive — temperature.
After a few days, taste your mead again. The green‑apple notes should start decreasing, though other fruity notes may remain if they were generated.
If you detect aromas like egg, cooked vegetables, or sewer, these are classic signs of contamination — a clear indication your batch is heading straight for the drain. If this happens, don’t get discouraged. It’s normal for a batch to get contaminated, especially when you’re starting out.
If your mead becomes too fruity, try placing it somewhere cooler. This means it’s producing a lot of esters, likely due to high temperatures, and this can lead to various types of contamination. - Second trick: monitor the evolution of sweetness. If after 5 or 6 days the sweetness hasn’t dropped much, it’s probably fermenting in a place that’s too cold — move it somewhere slightly warmer. Another possibility is that you added too little yeast, which would slow down fermentation.
Fourth secret: avoiding contamination
Many people aren’t aware that we’re surrounded by microorganisms — they’re everywhere. On the table, on your hands, in the pot, in the honey, in the fermenter…
These microorganisms aren’t always harmful. In fact, in mead, flavour doesn’t depend solely on the yeast you add; there’s an entire microbial flora that complements fermentation.
While the microorganisms naturally present in honey aren’t necessarily harmful for mead‑making, many others are. And most of the time, they appear due to poor hygiene.
One of the easiest defects to encounter is a vinegar aroma, produced by acetic bacteria, which transform the alcohol created by the yeast into vinegar.
The best way to avoid this is a proper sterilisation process for all equipment before use. If possible, it’s worth buying specific cleaning and sterilising products from shops specialising in wine or beer making. These products work perfectly.
Another common contamination comes from oxygen exposure. When you prepare the mixture, it’s good for the honey‑and‑water must to be in contact with air, since oxygen dissolves into the liquid and helps the yeast. But once you add the yeast to start fermentation, you must use an airlock so the gas produced can escape while preventing air from entering and contaminating the batch.
Fifth secret: pasteurisation — the cornerstone of sweet mead
This has always been the best‑kept secret among mead makers, because it’s one of the pillars that holds the entire craft together. Very few producers are willing to talk openly about their pasteurisation process — but we’re ready to break that silence and give you the guidelines you need to do it properly, without bottling little grenades waiting to turn your living room into a mascletà.
Why is pasteurisation so important in mead?
The answer is simple: you don’t want a bottle exploding on your table or in your fridge. When you bottle a sweet, low‑alcohol mead, there are still fermentable sugars left. Fermentation continues inside the bottle, pressure builds up, and two things can happen:
When you open it, you get a geyser of foam.
It explodes in your face.
Pasteurisation stops fermentation and locks your mead at the exact sweetness and alcohol level it had at bottling time.
Can you make mead without pasteurising?
Yes, you can.But if you want your mead ready in two weeks instead of six months, and under 12% alcohol, the Odin method is the way to go.
What equipment do you need?
A pot. Something to place at the bottom so the bottles don’t touch the metal directly. A thermometer that measures up to 100°C.
And remember: heating the bottles increases internal pressure, and they can explode. So you must take proper precautions:
Wear a protective face shield (like the ones used for angle‑grinder work).Wear gloves — leather if possible. Protect any exposed skin.
If you do everything correctly, no bottle should explode — but you never know.
You can pasteurise carbonated or still mead. Recycled beer bottles work for carbonated mead.Wine bottles work for still mead. The more carbonation, the higher the risk of explosion; the less carbonation, the lower the risk.
Pasteurisation is done after sealing the bottles hermetically.
How long and at what temperature?
Place the bottles in hot water, making sure they don’t touch the bottom.
Leave one bottle filled with water instead of mead — this is the one you’ll measure with the thermometer, since the others are sealed.Measure the temperature at the bottom of the bottle and let it rise to 70°C.Once it reaches that temperature, remove the bottles from the pot and let them cool at room temperature.
Do not put them in the fridge or in cold water — the thermal shock can break the glass (and the fridge won’t appreciate it either).
Why are we revealing our secret?
At this point, your mead will be ready to chill and drink whenever you like. If you’ve followed all the steps of the Odin method, you’ll end up with a stable, delicious recipe with a solid technical profile.
Finally — and as promised — here’s why we’re revealing the Odin method:
We’re convinced that if people start making quality meads at home and sharing them with those around them, a growing gastronomic culture around mead will begin to take shape. And that’s a huge benefit for us as producers because, let’s be honest, it will increase the number of fans of this drink that was already vintage before the world had tutorials — and therefore, it will also increase the number of our customers.
With nothing more to add: may Odin accompany your mead.
Have you tried our recipe yet?
If you’ve already tried our recipes, we’d love to see them on our social media. Tag your photo at @hidromielodin and use the hashtags #HidromielOdin, #MeadOdin and join our metal‑crafting club.
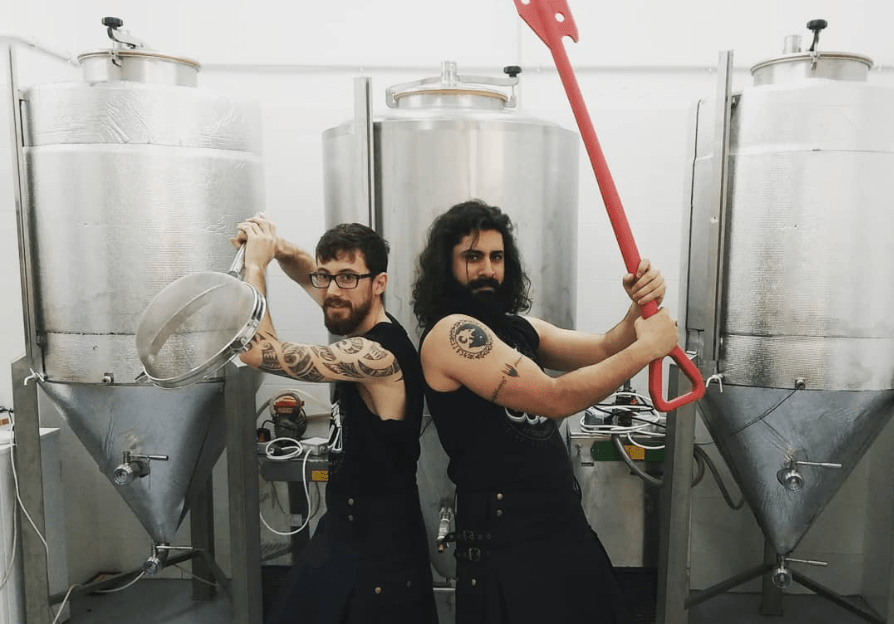
We’d love to see it





Pro‑level mead experience
Judges at the Queen’s Cup
The "Copa Reina" is one of those places where mead gets serious.
Organised by AESHI (Spanish Mead Association), the Queen’s Cup has earned its place as a benchmark event in Spain thanks to its strict criteria when evaluating mead recipes.
In this tribunal, recipes must be excellent, as the judges apply a technical standard that accepts no beginner quests — only deep organoleptic analysis.
For that reason, we thank AESHI for choosing us as judges in 2021, 2022 and 2023. We may not be the most traditional (in fact, not even remotely normal), but our tasting notes have proven to be a critical hit.

Opening hours
Open 10:00–15:00 Mon–Fri
Closed Saturdays, Sundays and public holidays
Visit us
Pol. Industrial Masia del Juez
C/José María Simó Nogués 46900
Torrent, Valencia (España)
Contact
(+34) 635 31 08 81
info@hidromielodin.com
Sale of alcohol to persons under 18 is prohibited.
Warning: Alcohol consumption during pregnancy or breastfeeding poses real risks and serious harm to the health of the fetus and the nursing infant.
Our awards
Yes, we’ve won awards. And no, we’re not making a motivational video about it.

Opening hours
Open 10:00–15:00 Mon–Fri
Closed Saturdays, Sundays and public holidays
Visit us
Pol. Industrial Masia del Juez
C/José María Simó Nogués 46900
Torrent, Valencia (España)
Contact
(+34) 635 31 08 81
info@hidromielodin.com
Sale of alcohol to persons under 18 is prohibited.
Warning: Alcohol consumption during pregnancy or breastfeeding poses real risks and serious harm to the health of the fetus and the nursing infant.
Our awards
Yes, we’ve won awards. And no, we’re not making a motivational video about it.

